Interactive Images in Webflow: Native Interactions, Embeds, and the Clean Path to Hotspots
Webflow gives you every tool for visual interaction. How to add hotspots to images — with built-in features or with embed code.
Two paths, one result
Webflow stands for visual web design without compromises — which is exactly why you can build hotspot images there in two very different ways. One is more "the Webflow way", the other more pragmatic.
The Webflow way: interactions plus absolutely positioned divs
In the Designer you build the hotspots yourself — no plugin, no external tool. Set the image as a container background or insert it as an img element. Set the container to position: relative. For each hotspot create a small div positioned absolutely. About 32×32 pixels, circular, semi-transparent.
In the Interactions panel, set up a hover trigger: on hover, a hidden tooltip div fades in. Create one tooltip div per hotspot with content — text, image, button — and hide it by default. Optionally add a click trigger that opens a lightbox or modal.
This is clean, fully manageable through the Webflow CMS, and animates nicely with CSS. The effort isn't trivial though: each hotspot needs position, trigger, and tooltip — ten hotspots on one image easily eats an hour.
Practical tip: position in percent
If you place hotspots in pixels, they wander on smaller viewports. Instead, set top and left in percent (relative to the container). Then the hotspots stay where they should, no matter how the image is rendered.
The faster route: embed element
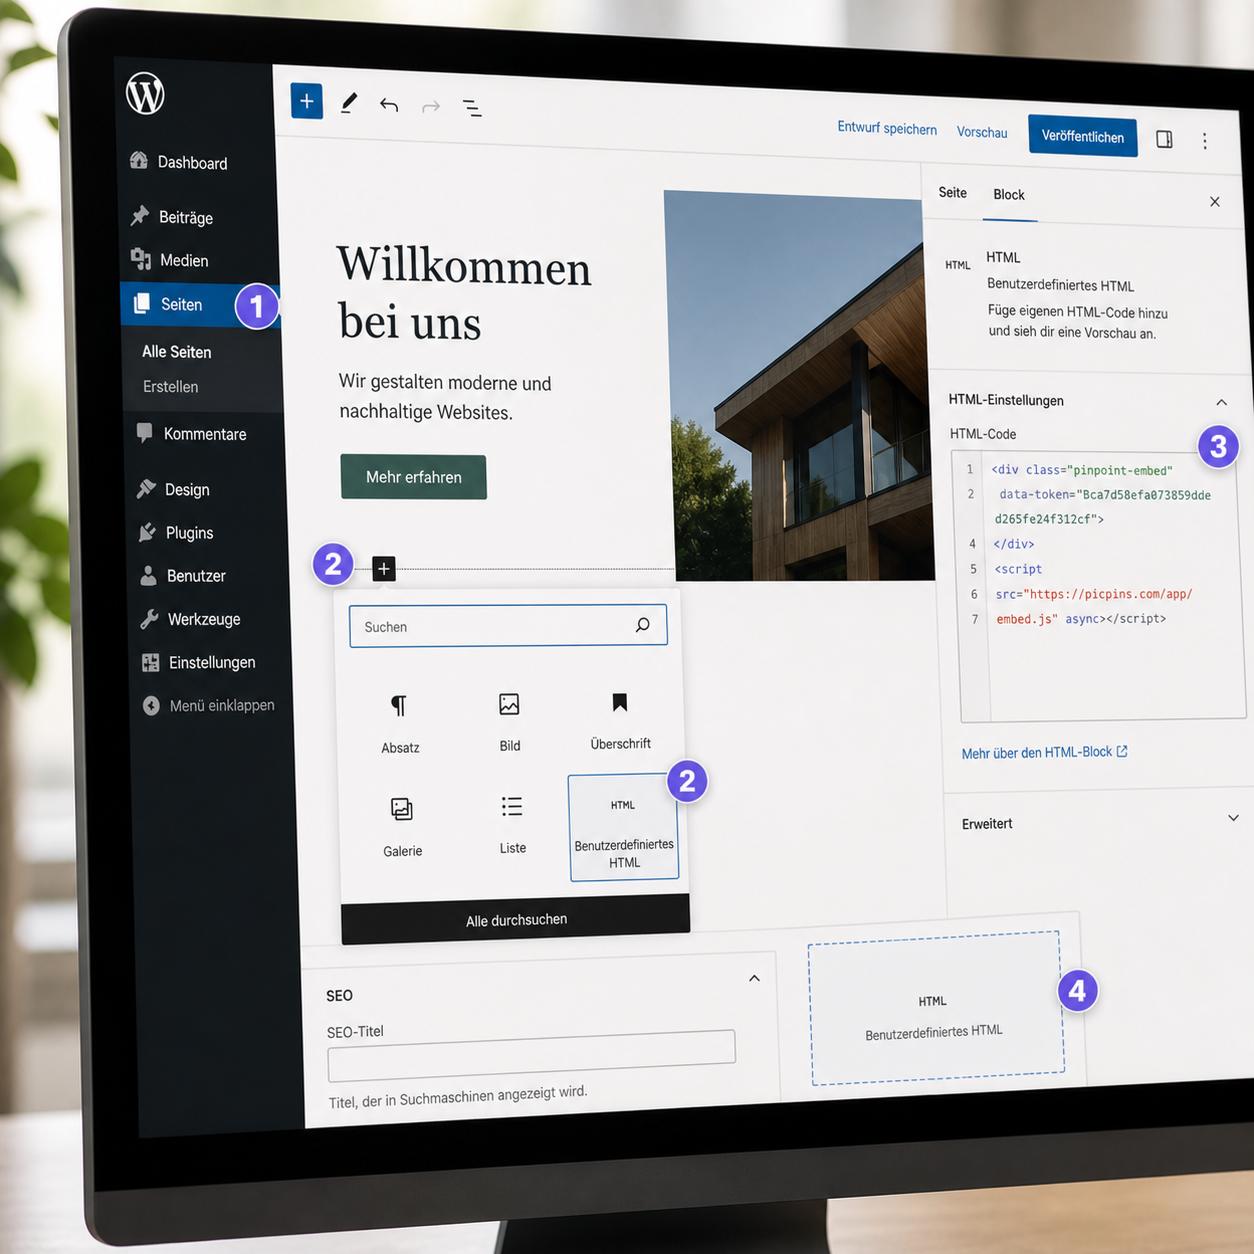
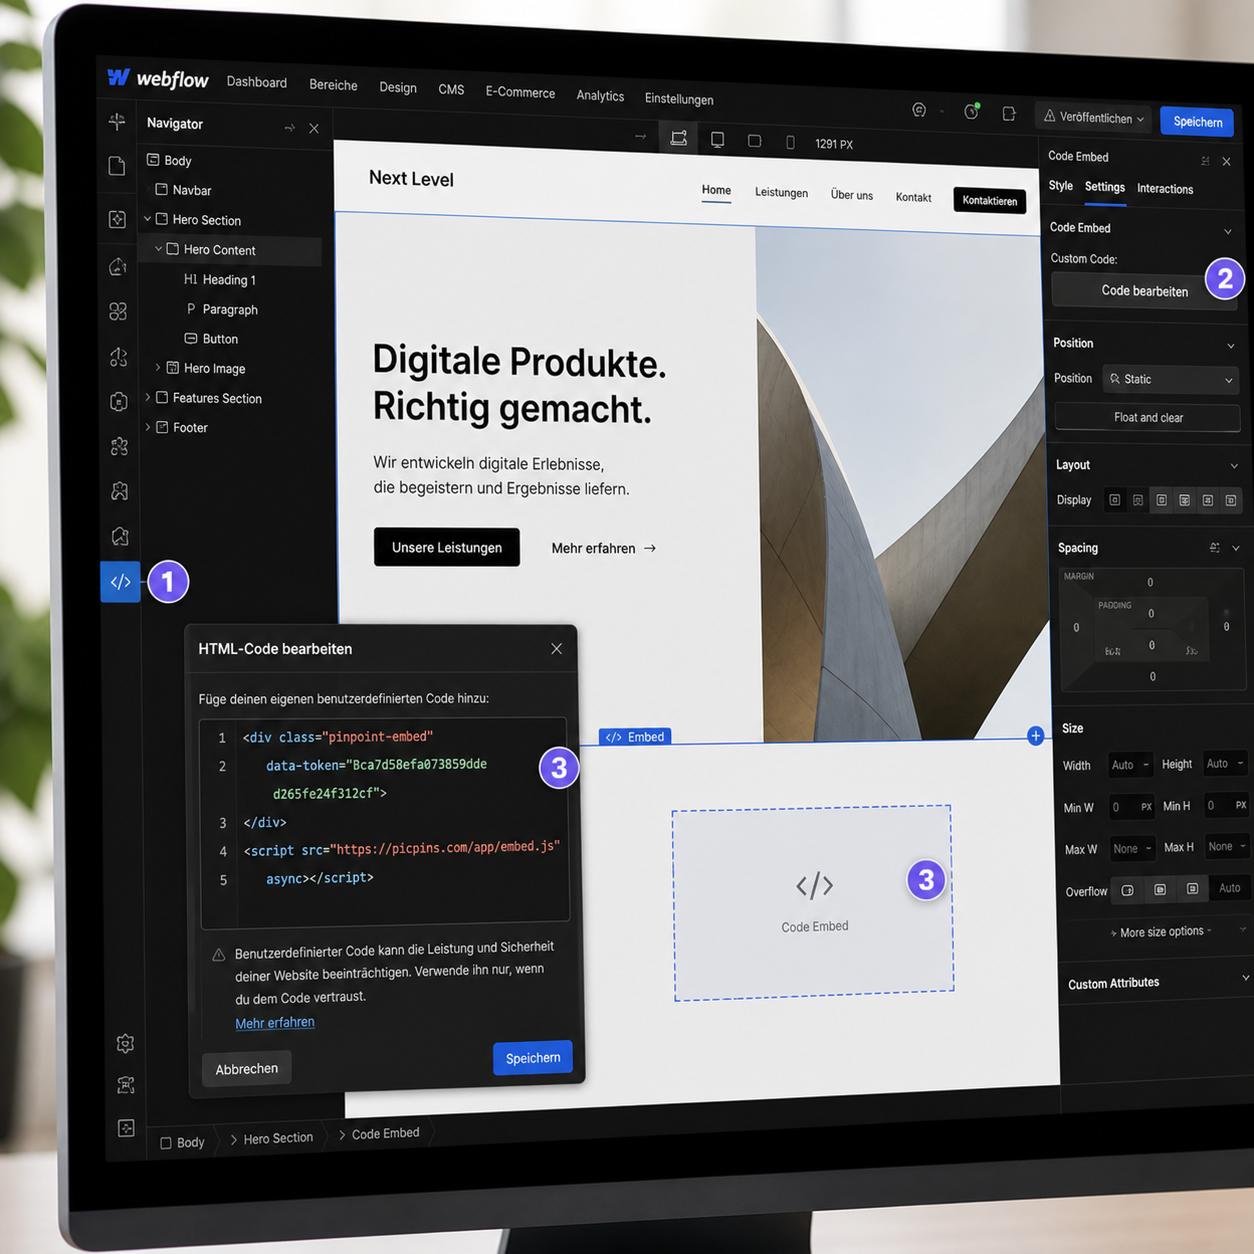
In the Designer you can also drag an Embed element onto the page and put any HTML in there. Drag the Embed from the Add panel onto the page, paste an HTML image map or a third-party embed code in the code modal, click "Save & Close", publish the site — the embed doesn't render live in the Designer, only the published version shows the result.
External tools like picpins
If you want to skip the work of the native approach and still need responsive, multilingual, or updatable hotspots, an external tool is often the more honest choice. picpins builds the interactive image on its side; you paste the embed code into Webflow's embed element. Later updates work without ever reopening Webflow — the embed always loads the current version.
When to use what
Native Webflow hotspots: when the image stays unchanged for long, every hotspot is built at once, the design has to match your brand pixel-perfect, and you want to show Webflow CMS data in the tooltips.
Embed with external tool: when you want to change the image later, need multilingual versions, reuse the same image across platforms, or simply don't want to spend a day building hotspots.
Performance
Native Webflow hotspots are part of the HTML — no extra HTTP request. Embeds usually pull in an additional script. For a single hotspot image on a landing page, that's not noticeable. For ten different embeds on one page, you'll see it in the Lighthouse score. Plan accordingly.