Adding Interactive Images to WordPress: Image Maps, Hotspots, and Modern Alternatives
Three ways to make an image clickable in WordPress — from the classic HTML image map to plugins to embed solutions like picpins. With pros and cons of each.
Why a plain image isn't always enough
A product photo shows several details at once. A map has different regions. A diagram explains a relationship. In all three cases a static image often isn't enough — visitors should be able to click on specific areas or hover over them to learn more. WordPress offers three sensible ways to do this.
Path 1: The classic HTML image map
HTML has known the <map> element since the 90s. With it you define areas on an image that act as links. The technique is old but still reliable — no plugins, no JavaScript, no external services.
Here's how: upload your image via the media library and note the exact URL. Determine the pixel coordinates of the clickable regions. Tools like image-map.net generate the code by letting you draw rectangles, circles, or polygons directly on the image in your browser. Then in your post or page, add a Custom HTML block and paste the code.
What works well: no dependency, no plugin, very fast. What doesn't: image maps don't scale responsively. On mobile, the defined areas end up in the wrong spots because the image renders smaller than the coordinates expect. JavaScript libraries like image-map-resizer can fix this after the fact — but it's cleaner to go straight to a modern solution.
Path 2: Dedicated plugins
The WordPress plugin directory has a handful of options for interactive images. Specialized hotspot plugins provide drag-and-drop editors, tooltips, and animations. The advantage: deep WordPress integration, editor right in the admin.
The downside: every additional plugin increases load time, can clash with others, and has to keep up with each WordPress update. Before installing, check the last update date and the reviews.
Path 3: External embed tools like picpins
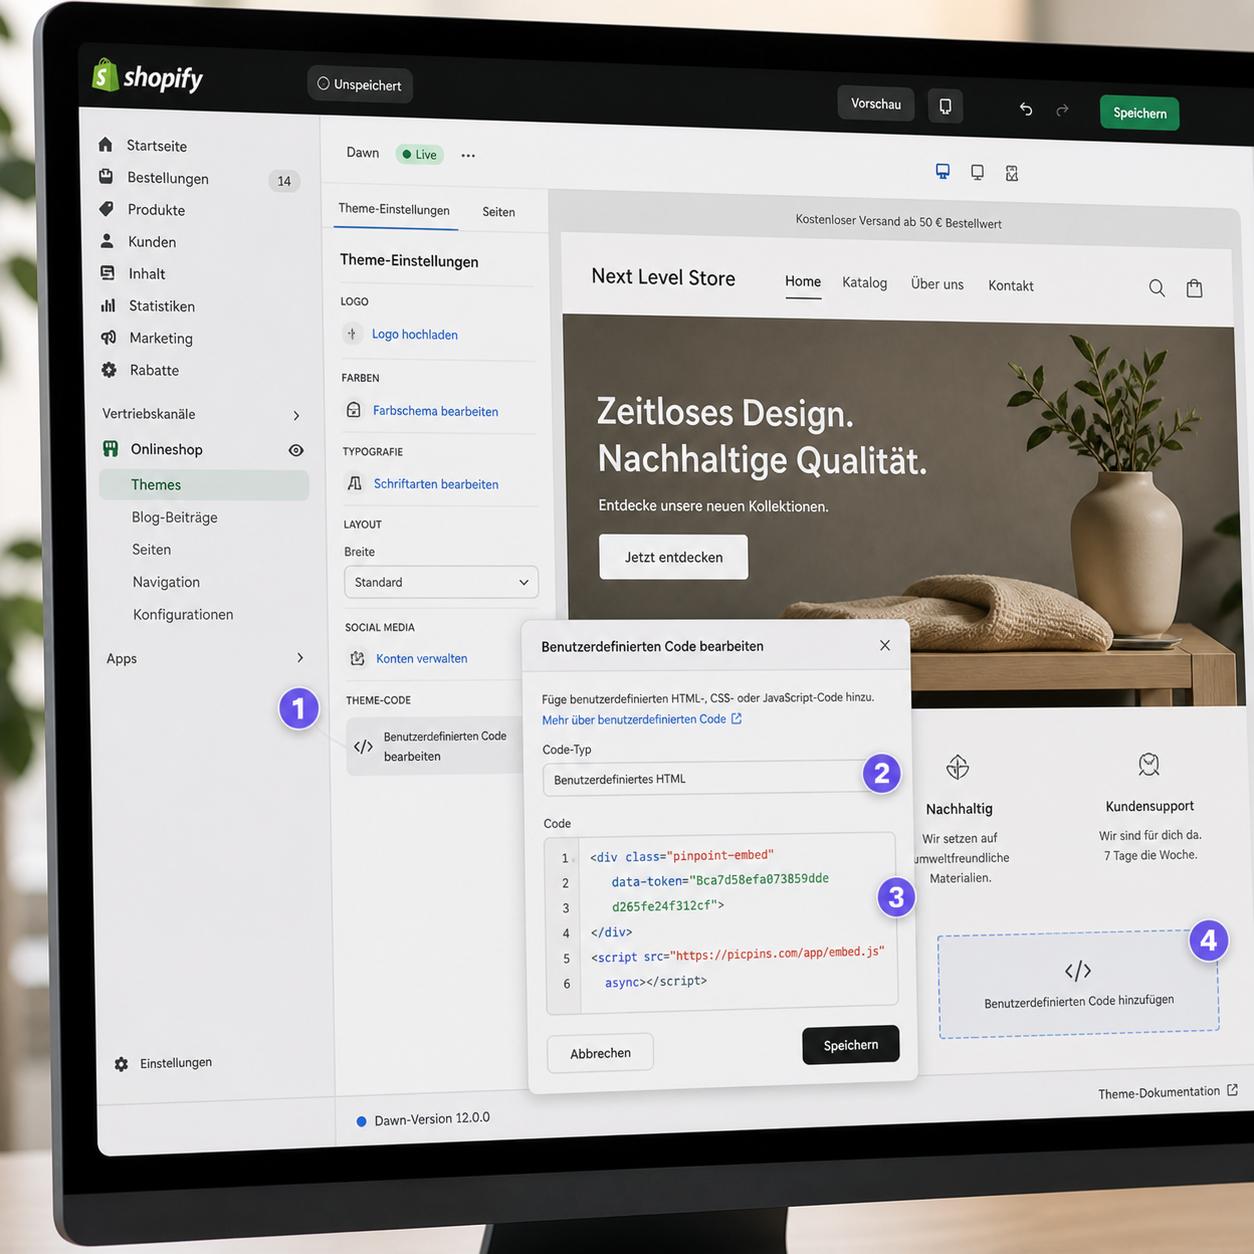
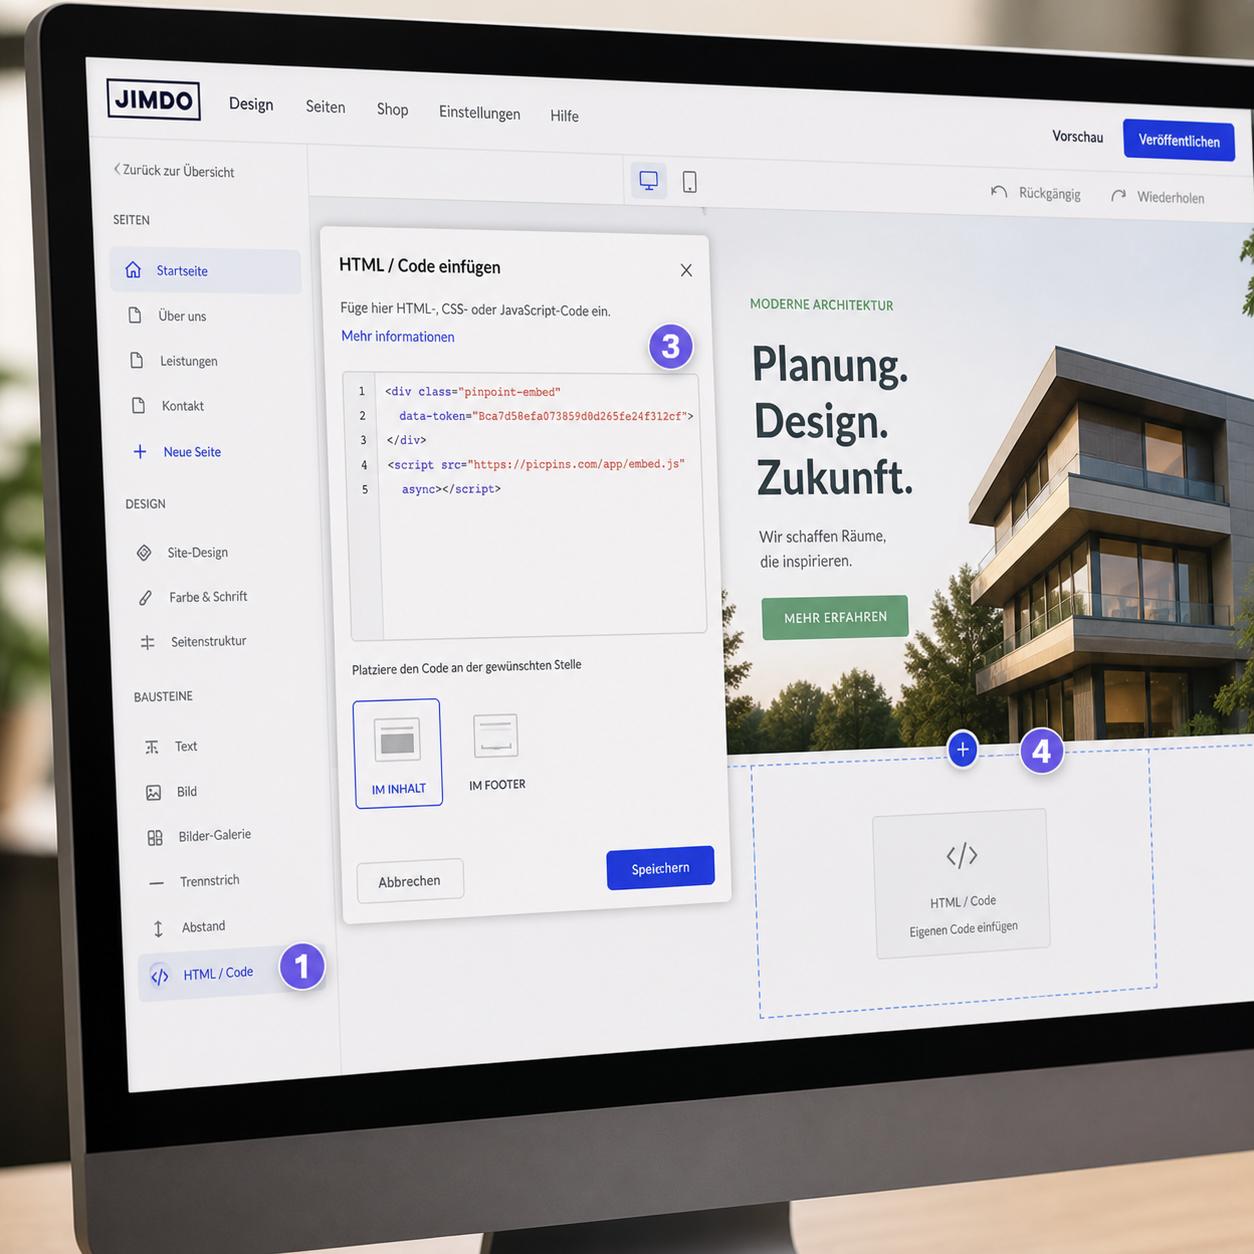
A third option is to build the interactive image outside WordPress and only insert a small embed code. Two upsides: the WordPress install stays lean, and you can reuse the same image on other platforms — Shopify, Webflow, a PDF landing page, anywhere.
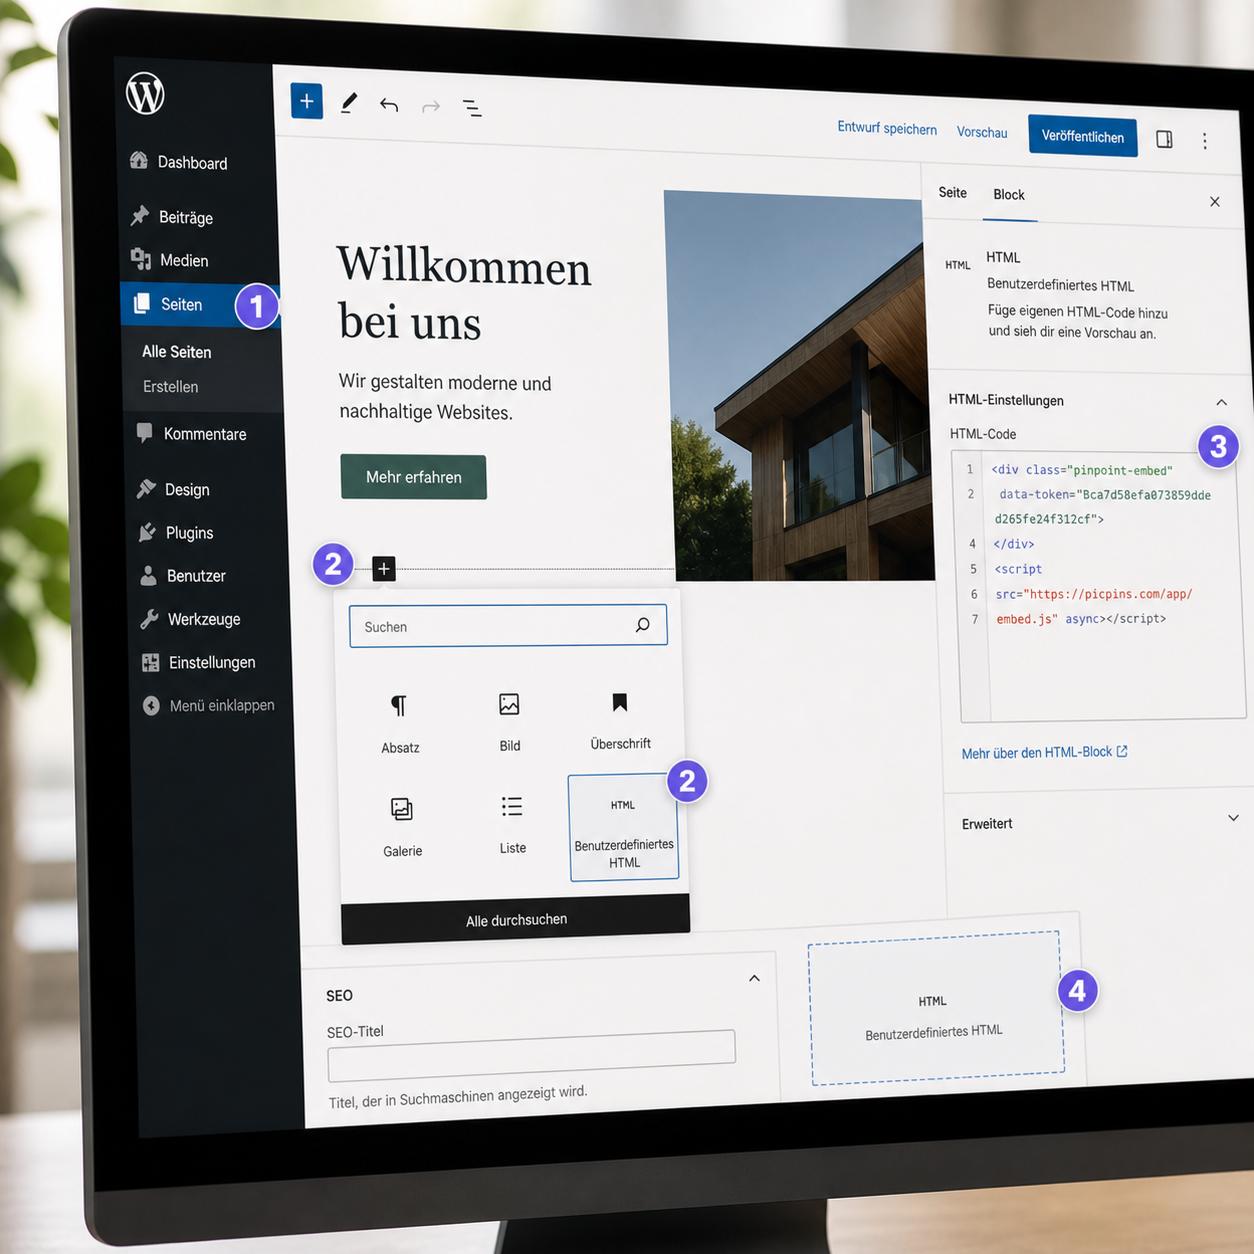
With picpins for WordPress the flow looks like this: upload the image at picpins.com, place markers, fill the tooltips with text, images, or buttons. Publish the project, copy the embed code. Back in WordPress, insert a Custom HTML block, paste, save. The embedded content adjusts responsively, works on touch devices, and can be edited later without ever reopening the WordPress post.
Which path makes sense for you?
If you need a one-off, simple image map and don't want to add another tool — the classic HTML approach is fine. For regular interactive images with tooltips, embedded media, or multiple views of the same shot, a dedicated tool is the sober choice. Plugins make sense if everything has to stay inside WordPress; embed tools, if you want to use the same image across platforms.
Watch out for caching
If the embedded image doesn't appear after saving or loads only partially: WP Rocket, W3 Total Cache, and similar plugins cache aggressively. Clear the cache once after embedding, then the change shows up immediately.