Clickable Product Images in Shopify: Hotspots, Image Maps, and Shop-the-Look
How to add clickable areas to images in Shopify — directly in pages, product descriptions, or as a theme section. With or without an app.
What is shop-the-look?
A clickable lookbook photo where every garment links to the matching product. A furniture scene where every chair, lamp, and rug is linked. That's the classic shop-the-look idea — and Shopify offers several ways to pull it off.
Option 1: Native shop-the-look section in the theme
Several newer Shopify themes ship with dedicated sections. In the theme editor under "Add section" you'll find entries like "Shoppable image" or "Hotspots". You upload an image, drag the hotspots to the right spots, and link each hotspot directly to a product from your catalog. On click, a mini product card opens with price and add-to-cart button.
If your current theme doesn't have this, check its changelog or look for updates. Many themes have added the feature in the past few years.
Option 2: Apps from the Shopify App Store
The App Store has dedicated apps for hotspots — from simple lookbook tools to full shoppable image solutions. Apps are convenient, but most charge monthly and load extra scripts that can measurably slow your shop down. If your theme already has a hotspot section, you don't need these apps.
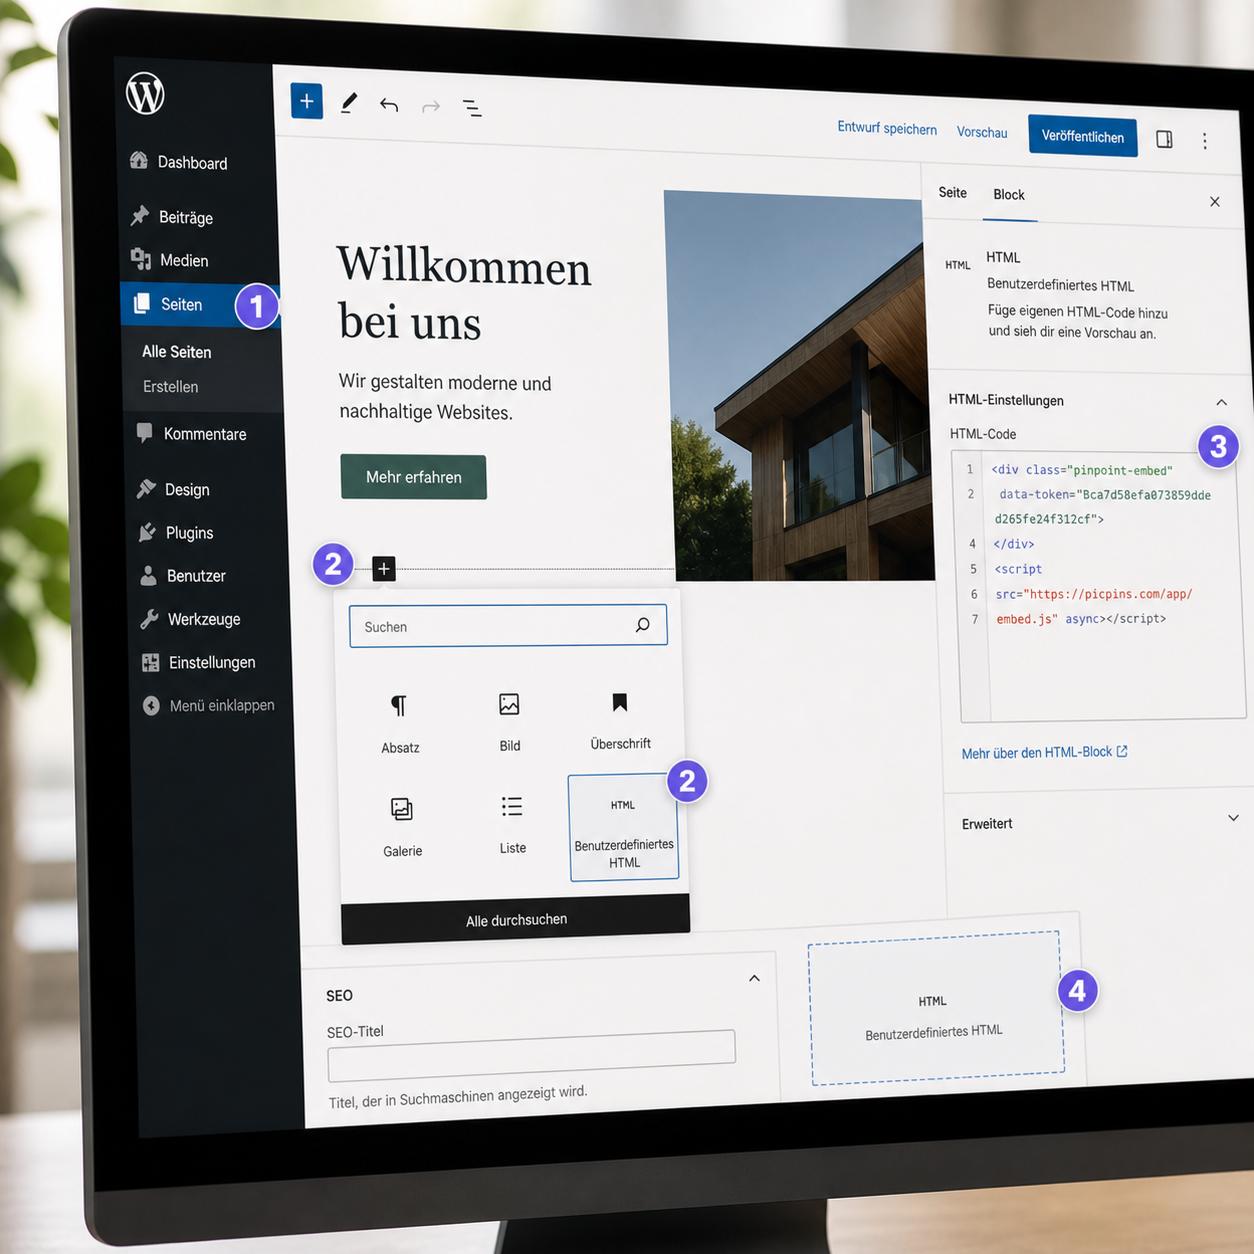
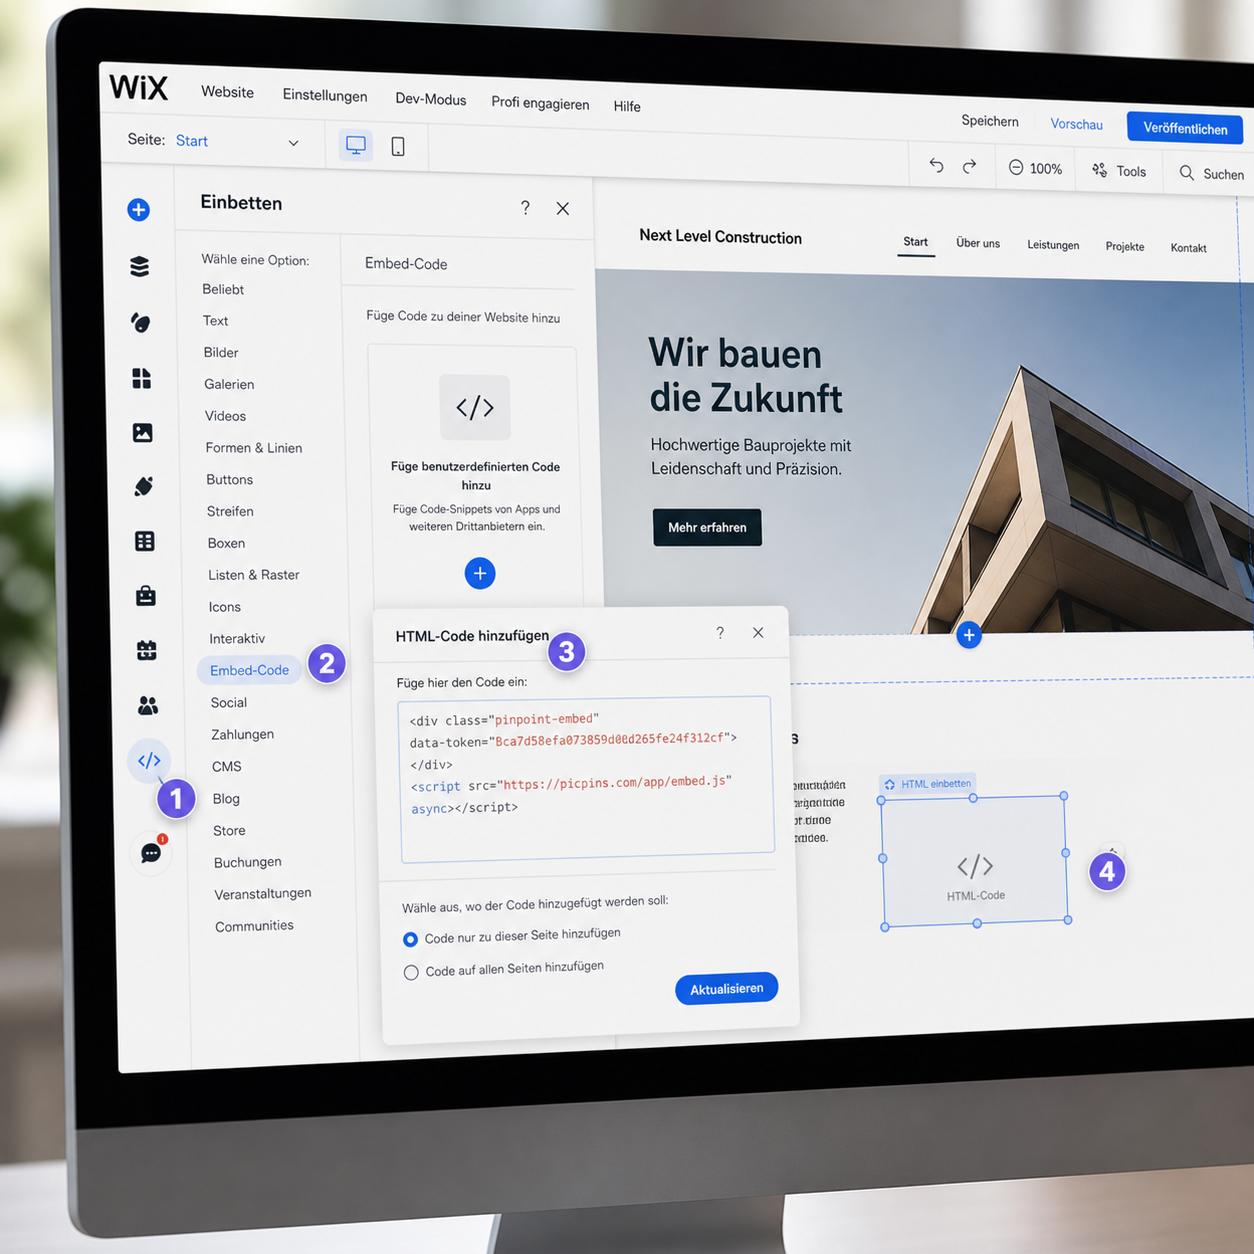
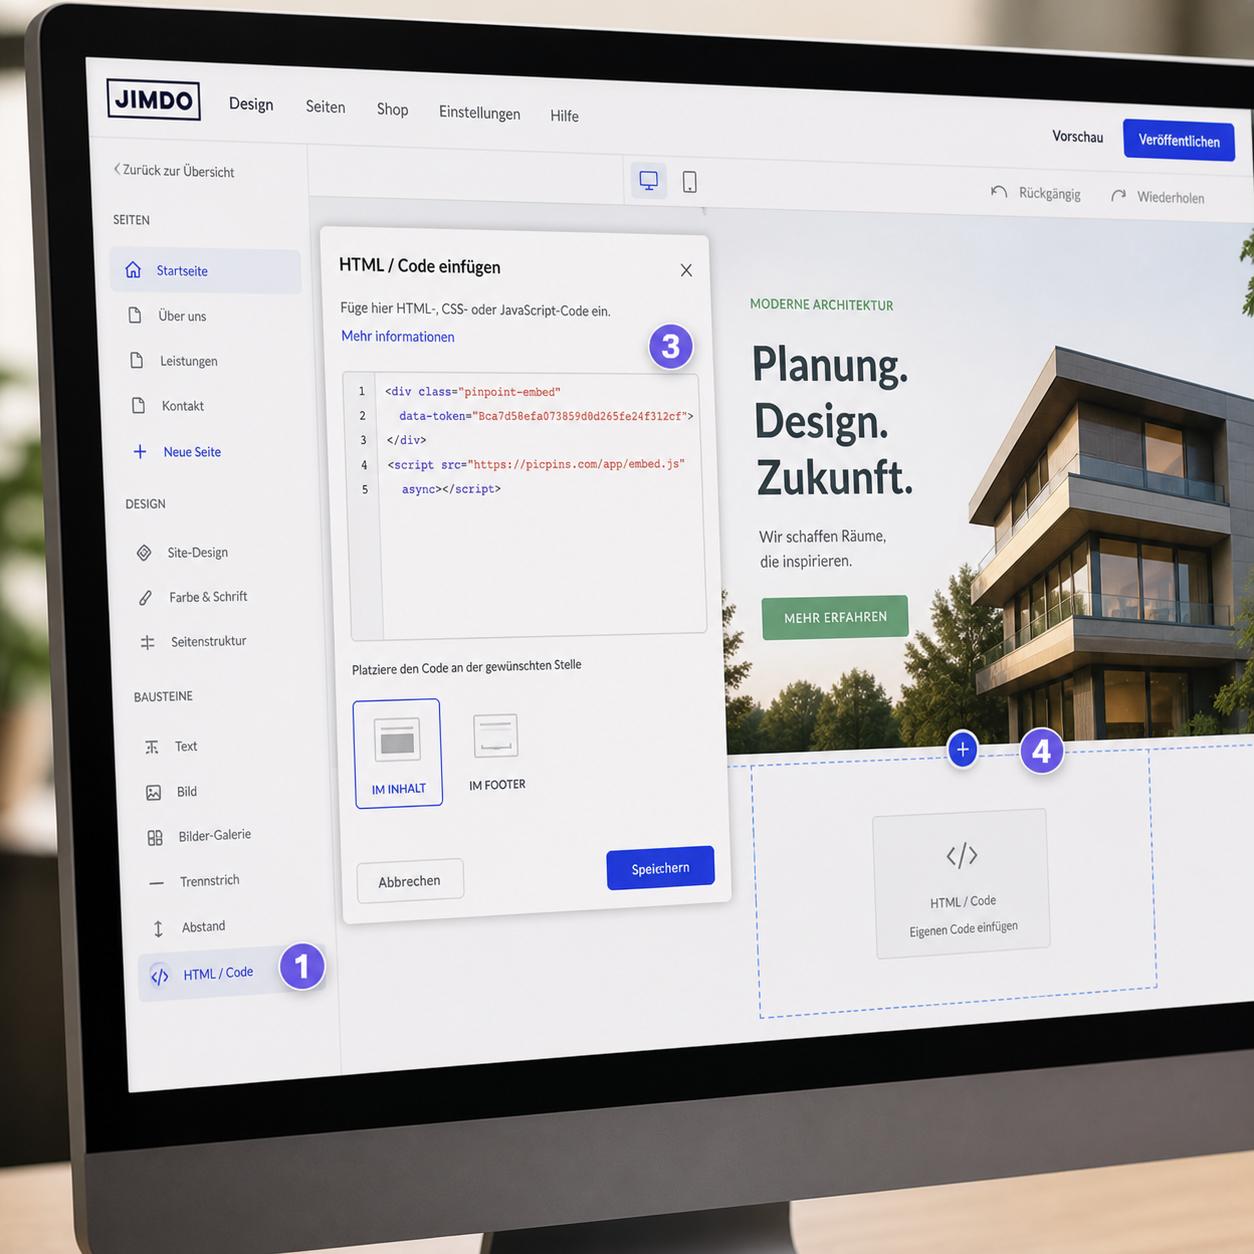
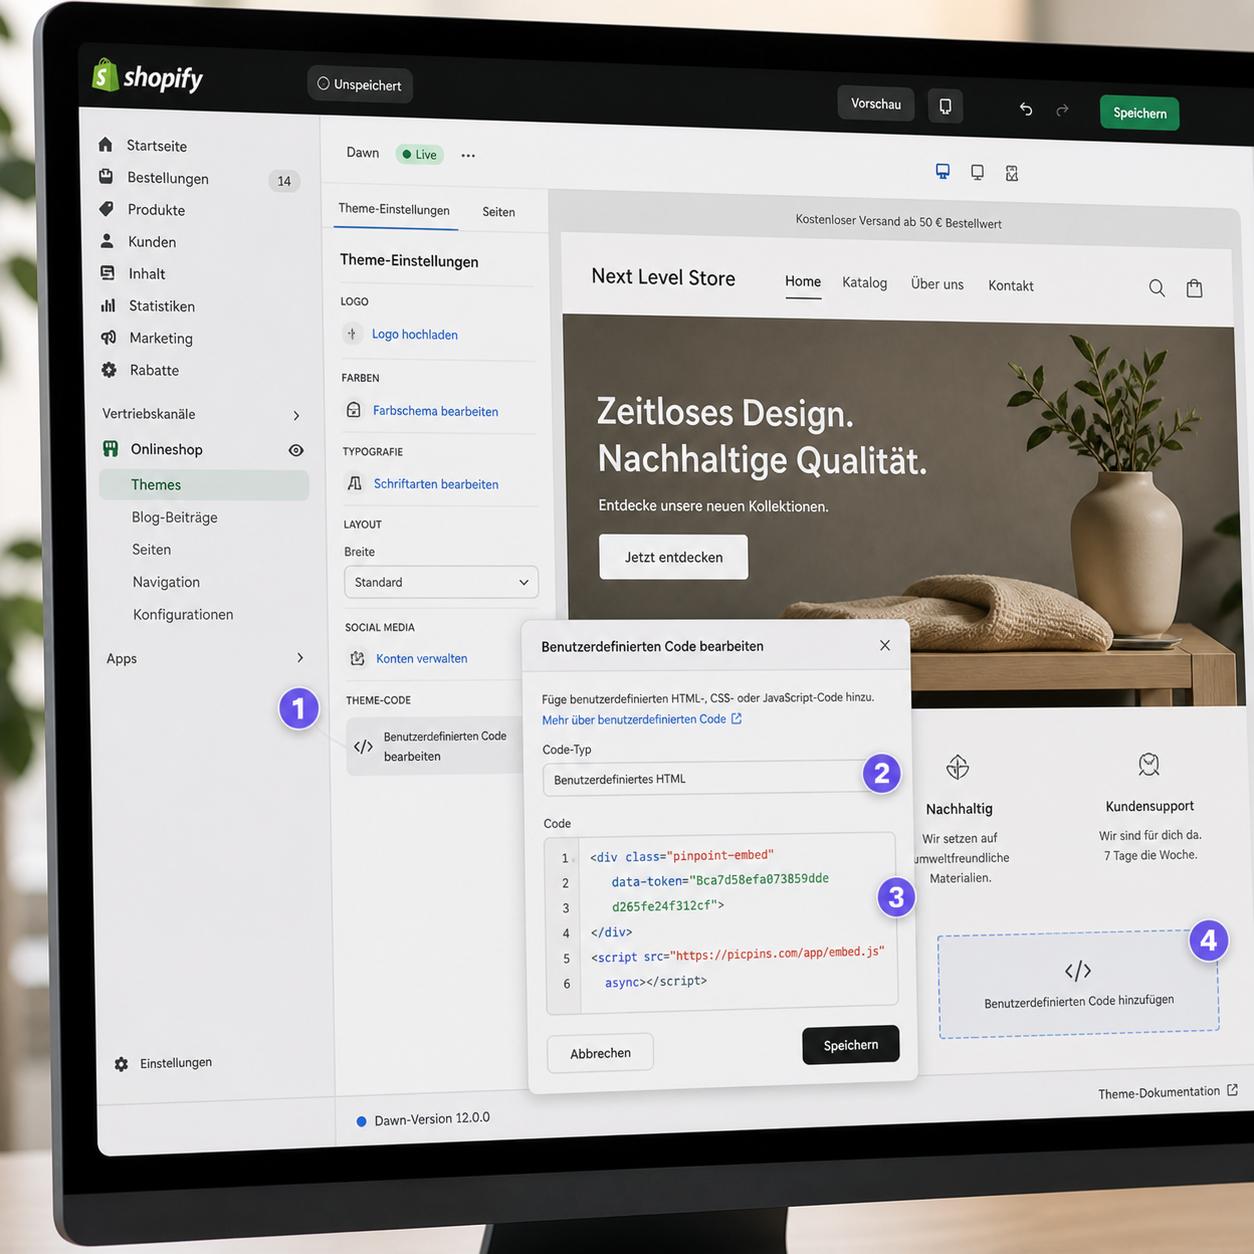
Option 3: Classic HTML image map on a page
If you're building a custom landing page and no theme hotspot is available, the old-school path is the HTML source view. In the Shopify admin go to Online Store → Pages, create a new page, click the </> icon in the top right of the text editor, and paste the image map code. The usual catch: coordinates are static and don't adapt to different image sizes. On mobile, hotspots end up in the wrong places.
Option 4: Custom Liquid section with embed code
The theme editor lets you insert a Custom Liquid section anywhere on the page. You can put arbitrary HTML, CSS, and JavaScript in there — including the picpins embed code or your own SVG-based hotspot solutions.
Workflow with picpins: upload image at picpins.com, place markers, fill tooltips with product info. Copy the embed code. In the theme editor: "Add section" → "Custom Liquid" → paste code → save. The advantage: full control, the image is responsive, and you can change hotspots later without ever reopening the Shopify editor.
What works in product descriptions
In the product editor itself you can switch the description field to HTML source view and paste embed codes or image maps there too. Some themes hide content above a certain height on mobile or tuck it behind "Read more" — test your solution on a phone before publishing.
Performance note
Shopify shops get rated on their page speed score. External embeds and extra apps lower that score. If speed is critical, the native theme section is meaningfully better than an external solution. For occasional hotspot images, the difference is negligible.