Interactive Images on Your Own HTML Page: Image Map, SVG Hotspots, and Modern Embeds
On a hand-built HTML page you have all the freedom. Three paths to clickable image regions — from old HTML to the SVG-based approach.
Full freedom on your own HTML page
On a hand-built HTML page there are no CMS restrictions, no plugin filters, no editor quirks. You have full control over every tag and pixel. That's exactly why a sober comparison of the three clean paths is worth it here.
Path 1: Classic HTML image map
The original, standardized in HTML 3.2. Works in every browser since the 90s. An img tag with a usemap attribute, a map tag with any number of area elements. Each area can be shape="rect", "circle", or "poly", defines the clickable area via coords, the link target via href, and a meaningful description via alt.
Advantages: no JavaScript, no external service, very robust, search-engine friendly (links inside the map are recognized as real links). Disadvantages: not responsive. If the image renders smaller than the coordinates expect, visitors click into nothing. Tooltips are only possible via the title attribute (browser default tooltip, ugly, slow, unreliable on touch).
Workaround for responsive: image-map-resizer
A small JavaScript library (image-map-resizer on GitHub) attaches to the image map and adjusts coordinates in real time to the current image size. Solves the scaling issue but doesn't change the ugly tooltip presentation.
Path 2: SVG with hotspots — the modern approach
If you already have the image as SVG or are willing to build a small wrapper structure, SVG is the clearly more elegant solution. Hotspots are defined as invisible or semi-transparent SVG shapes, animated via CSS, and given tooltips via JavaScript.
Concretely: a container with position:relative, the image as an img tag inside it, and an SVG element absolutely positioned over it. Inside the SVG, circle, rect, or polygon shapes carry their own hover effects. Advantages over image map: fully responsive (the SVG scales with the container), animatable via CSS, arbitrary shapes, custom hover effects.
Disadvantages: more code, a bit more CSS understanding required. For richer tooltips (with images, buttons, videos) you have to write JavaScript logic.
Path 3: External tools via embed
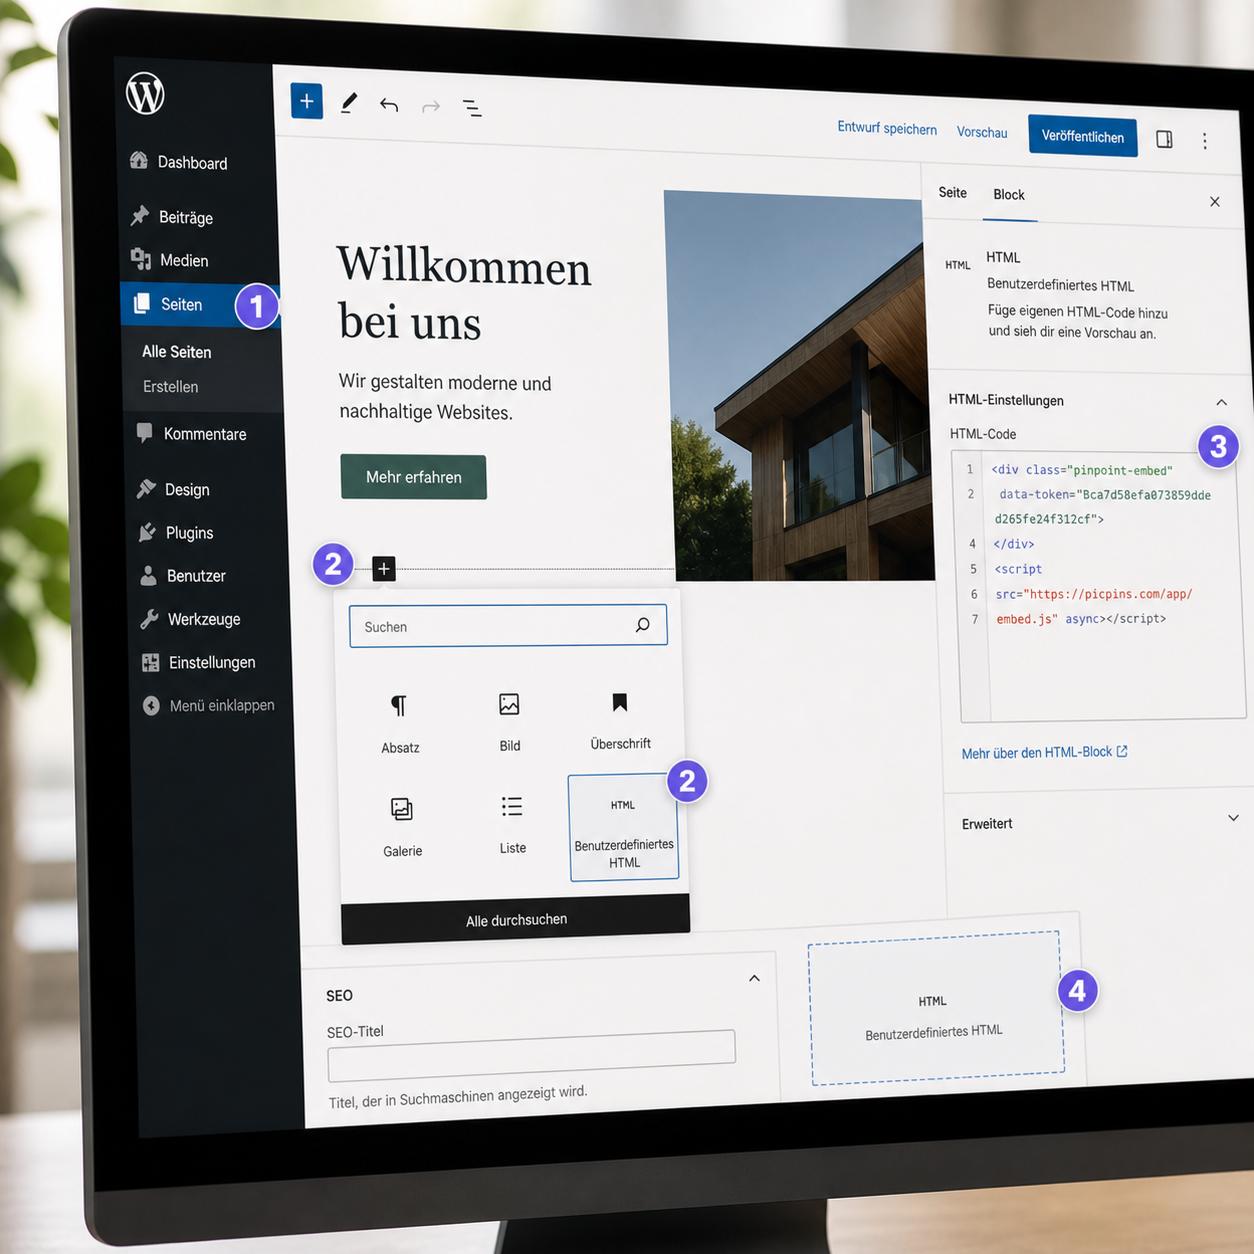
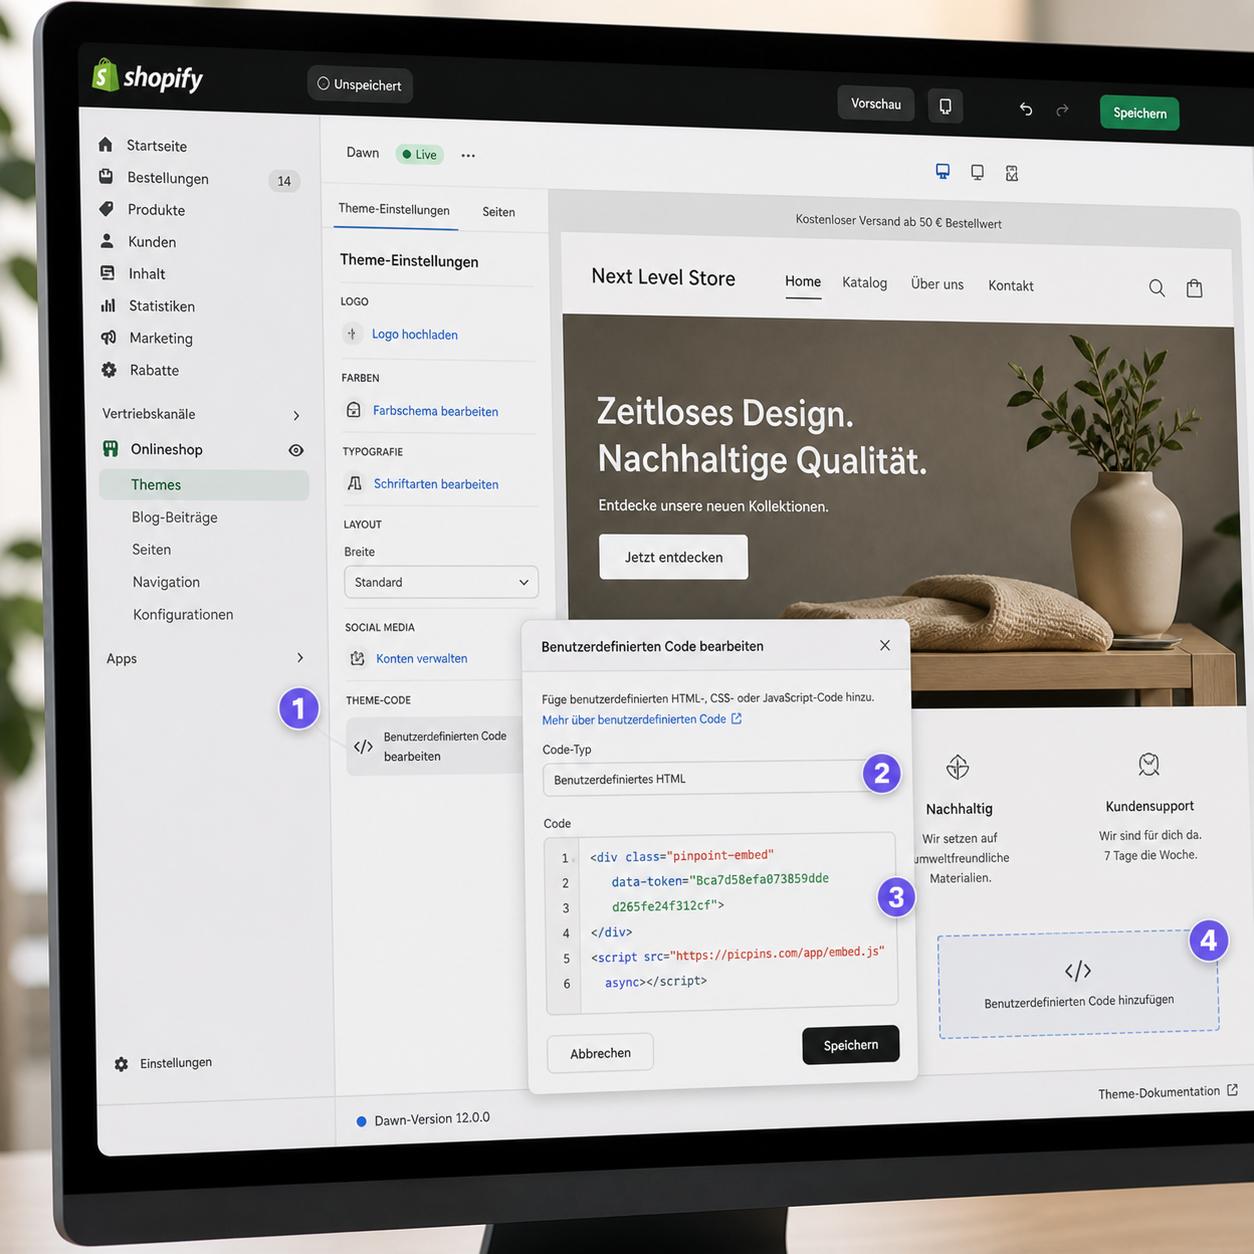
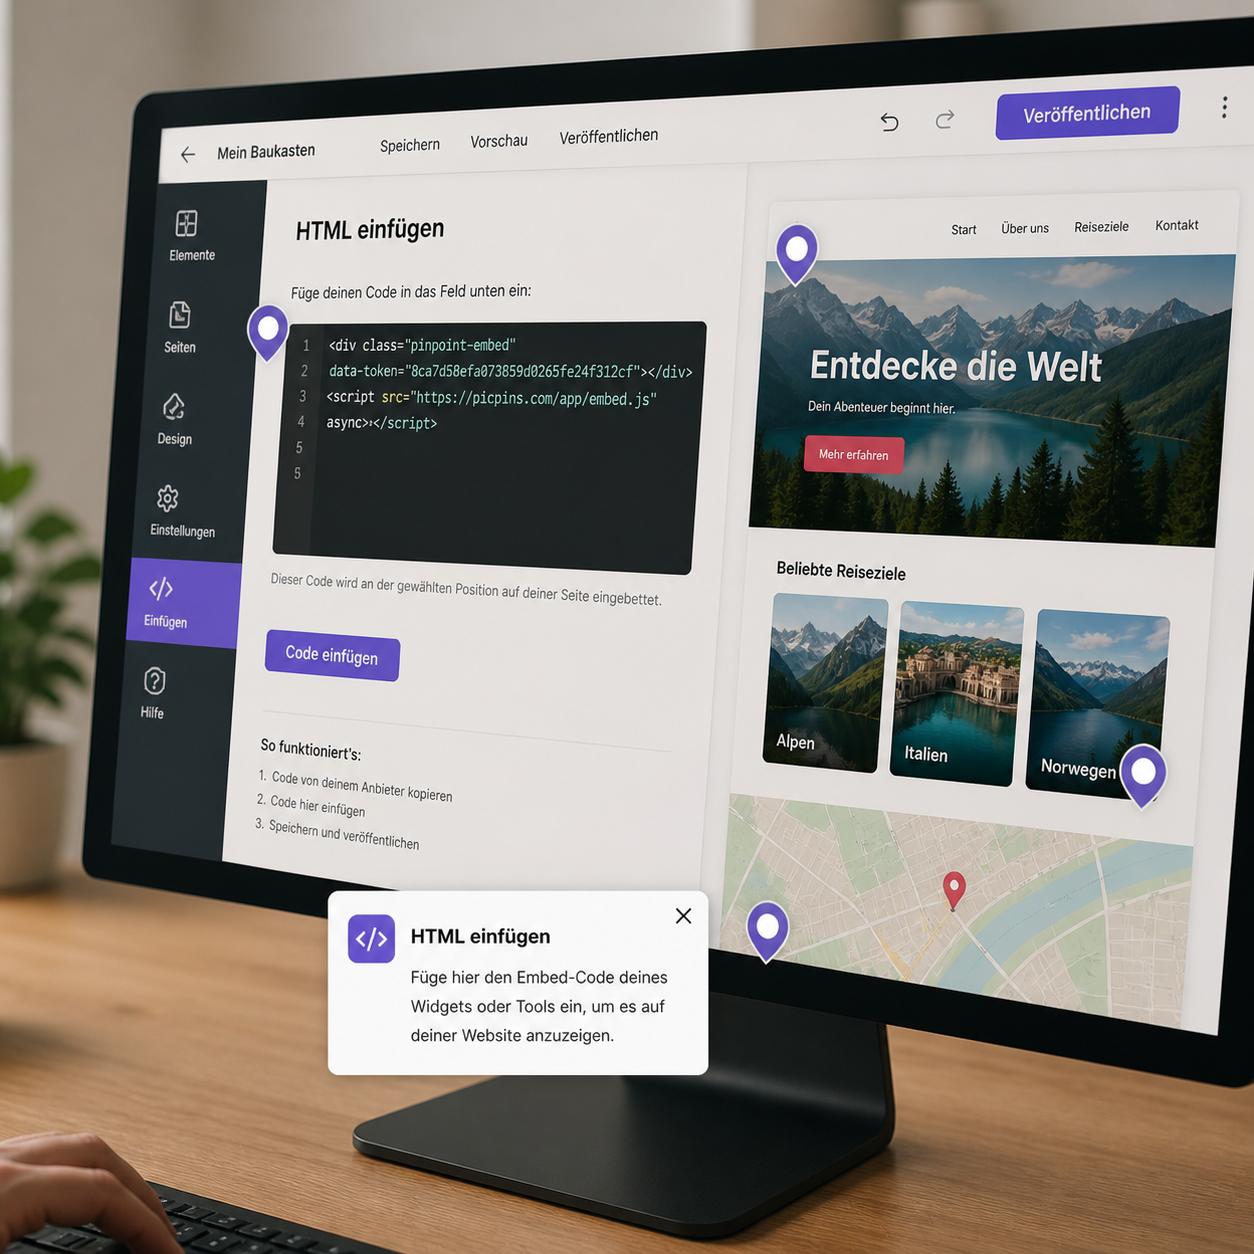
If you don't want to write code, a dedicated tool like picpins is the pragmatic way. You build the interactive image in the provider's browser interface and copy an embed code. Paste the code at the desired spot in your HTML file. That's it.
Advantages: tooltips with images, buttons, videos out of the box. Mobile-ready. Multiple views of the same image possible. Changes don't require touching the HTML — they happen in the provider dashboard. Disadvantages: dependency on an external service. If the provider disappears, so do the hotspots. For critical infrastructure, self-host instead.
Pitfalls that affect all three paths
Content Security Policy: if you've set a CSP header, external scripts and images must be explicitly allowed. For a picpins embed, that means picpins.com in script-src and img-src.
Lazy loading: images with loading="lazy" only load once they scroll into view. Image maps can fail initially because the image size is zero at initialization time. For hotspot images, prefer loading="eager" or no lazy attribute at all.
Accessibility: regardless of path — every clickable region needs a meaningful alt or title text, and the interaction has to be keyboard-navigable. Image map areas have that built in; SVG shapes need tabindex="0" and a keypress handler.
Which path fits?
Classic image map: for static, simple use cases without tooltip ambitions — and only when responsive isn't relevant.
SVG with hotspots: for high-quality, long-lived content you're willing to invest custom work in.
External tool via embed: for anything that has to be quick, will change often, needs multilingual support, or runs across multiple websites in parallel.