How to Create an Interactive Image Description Without Code
What an interactive image description is, when it pays off, and how a working example can be built in just a few minutes — no programming, no external software.
What exactly is an interactive image description?
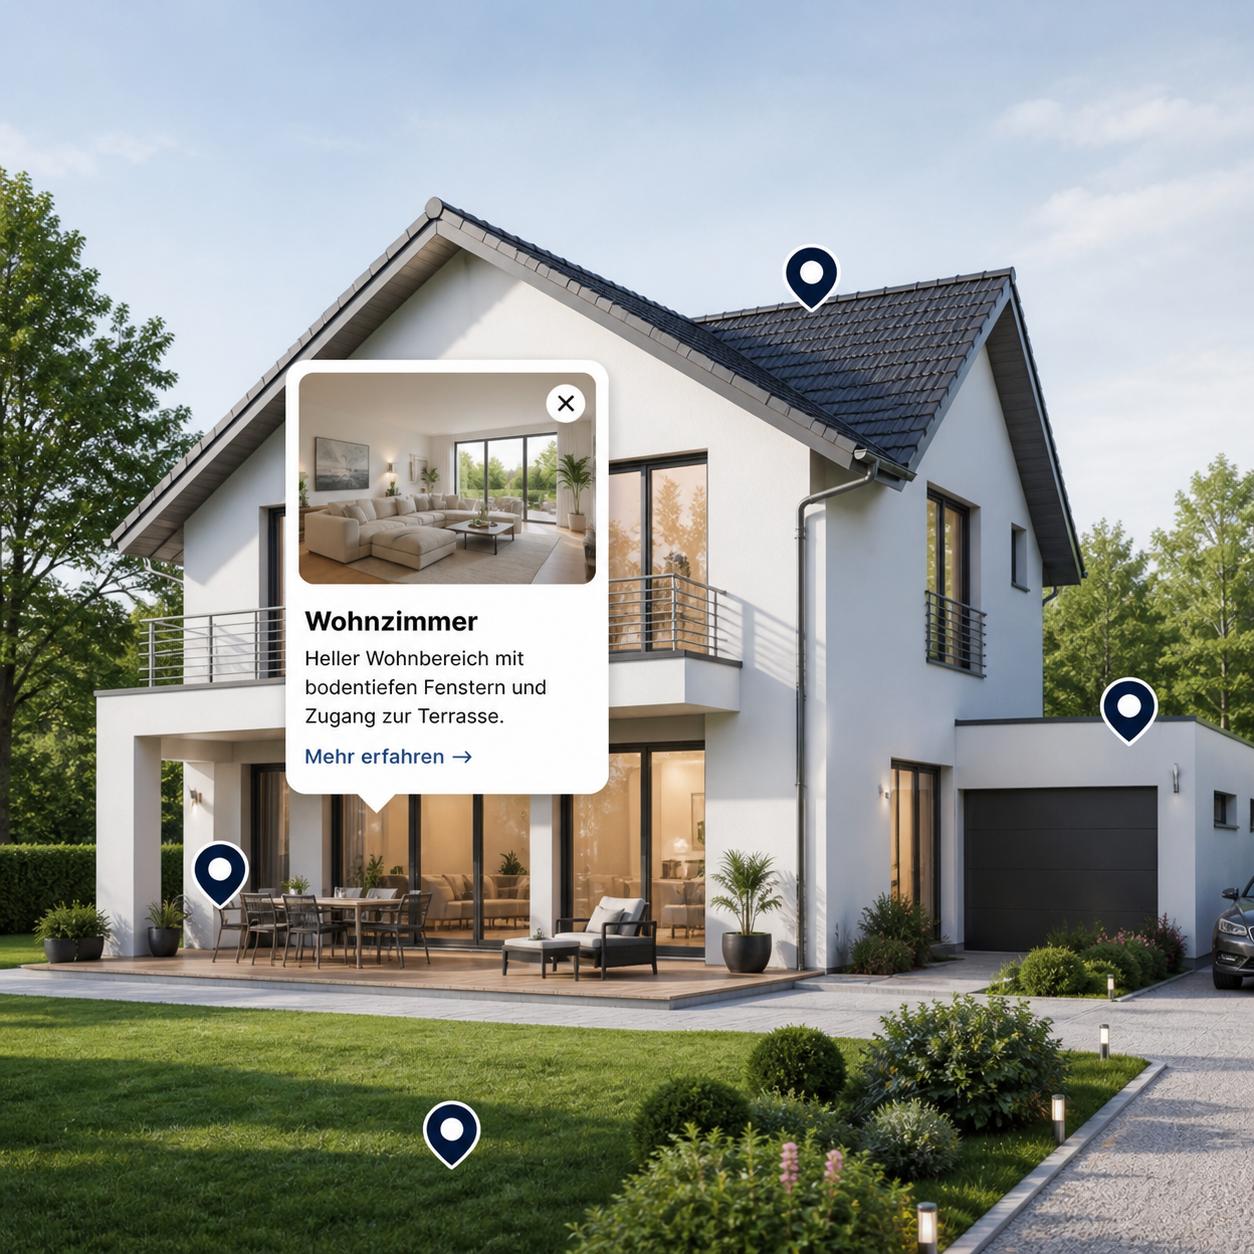
A classic image description sits either below the image or in the alt text. It's linear: one sentence after another, making the image accessible to readers or screen readers. An interactive image description takes a different approach. Information sits directly on the image itself — as clickable or tappable points. Anyone wanting to know more about a particular detail clicks on it and sees a tooltip with text, images, videos, or links.
The advantage: the reader decides how much depth to engage with. At first glance, the image looks like any other. Anyone who wants to dig deeper finds additional layers. This format works especially well for content carrying lots of detailed information that doesn't need to be visible right away — manuals, product photos, maps, diagrams, or schematics.
When is the extra effort worth it?
The honest answer: not always. If an image has no content that needs explaining, a regular caption does the job. But as soon as terms, measurements, functions, or individual components need to be described, the interactive variant adds real value. An infographic showing ten hardware components of a computer becomes much clearer with hotspots than with a long list next to it. A diagram of a historic marketplace can be labeled without the buildings themselves disappearing under text.
The same principle is well established in e-commerce: a lifestyle photo featuring several products gets a clickable point on each one, complete with price and a link to the shop. This format, often called a „shoppable image", is a particularly commercial flavor of the interactive image description.
What does the creation process look like?
It always starts with the image itself. It should be high-resolution enough that nothing becomes pixelated on large displays, and the framing should include everything that's meant to be labeled later.
In picpins, the image is uploaded as a new project. The editor then offers a handful of tools. The point tool drops a clickable pin at the desired spot — ideal for precise markings like a specific screw or a term in a diagram. Rectangle and ellipse are useful for framing whole areas; the polygon tool handles irregular shapes like countries on a map or rooms on a hand-drawn floor plan.
As soon as a marker is placed, the tooltip editor opens automatically. Individual building blocks can be combined there — a heading, an explanatory paragraph, an extra photo, a video, a link button. Once the result feels right, the Preview button shows exactly what visitors will see later.
How does the image get onto a website?
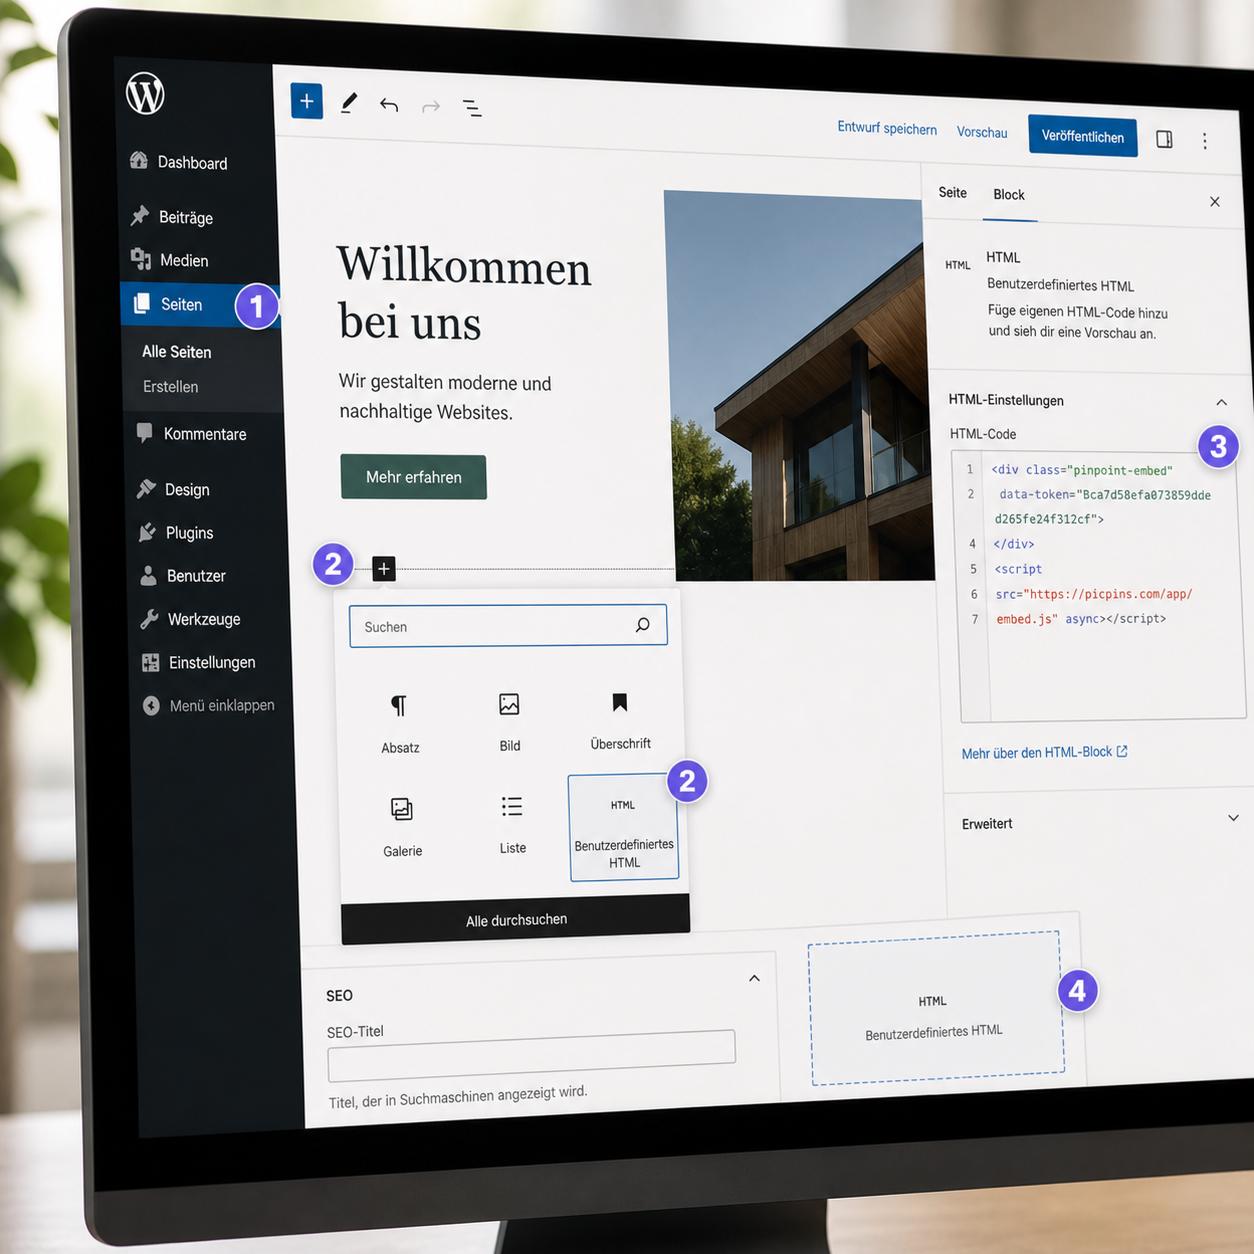
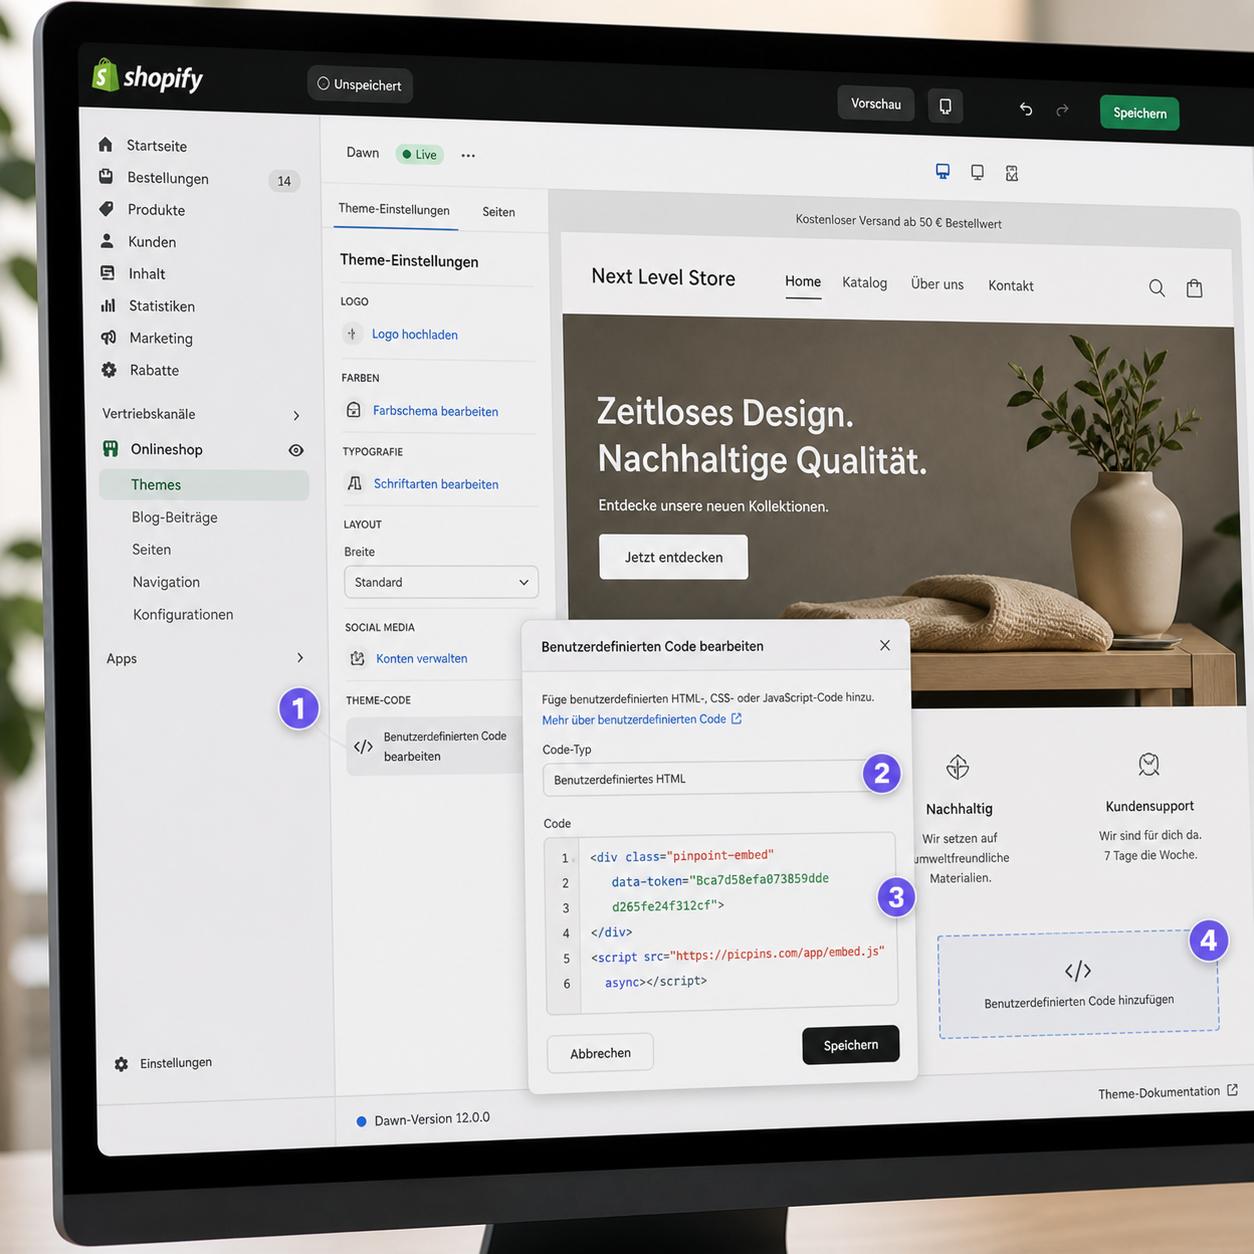
In the editor, the Embed button delivers a short HTML snippet. It consists of an empty container and a reference to the picpins script. Pasted into WordPress, Webflow, Shopify, or directly into an HTML page, the script automatically loads the image along with all markers. There's no need to host individual images or tooltips elsewhere — everything comes from the picpins server.
Changes to markers or description texts automatically propagate to every place where the image is embedded. Fixing a typo doesn't require copying any code again. This makes maintaining existing posts noticeably easier than with classic HTML image maps, where everything is hardcoded in the markup.
Does it also work on mobile?
Yes, with one caveat. Hover effects don't really apply to touch devices, so tooltips on smartphones open with a tap by default. On very small images, markers can sit close together — a larger source image or a deliberately sparse set of points helps here. picpins also allows setting a minimum width on the embed, so that on mobile devices the image becomes scrollable instead of shrinking down to an unreadable size.